Wednesday 19 December 2012

CHOCOLATE THUMBPRINT COOKIES


Maybe it’s Christmas getting closer, or maybe it’s just  the explosion of cookies pictures I see everyday on beautiful blogs, or maybe it’s just that we’re all addicted at a certain extent to butter and chocolate. Especially when they show up together. Ok, me, I am addicted to it.
In any case, you can deny it, but I know I’m not alone.
Anyway, whatever the reason, I’ve been in a thumbprint mood for days. I’ve seen pictures of these decadent cookies in perfectly circular shapes, decorated with pecans and overflowing with chocolate and caramel, looking so wow that my mouth gets watery just at the thought of them.
So of course I couldn’t try those as a first attempt at thumbprint cookies.
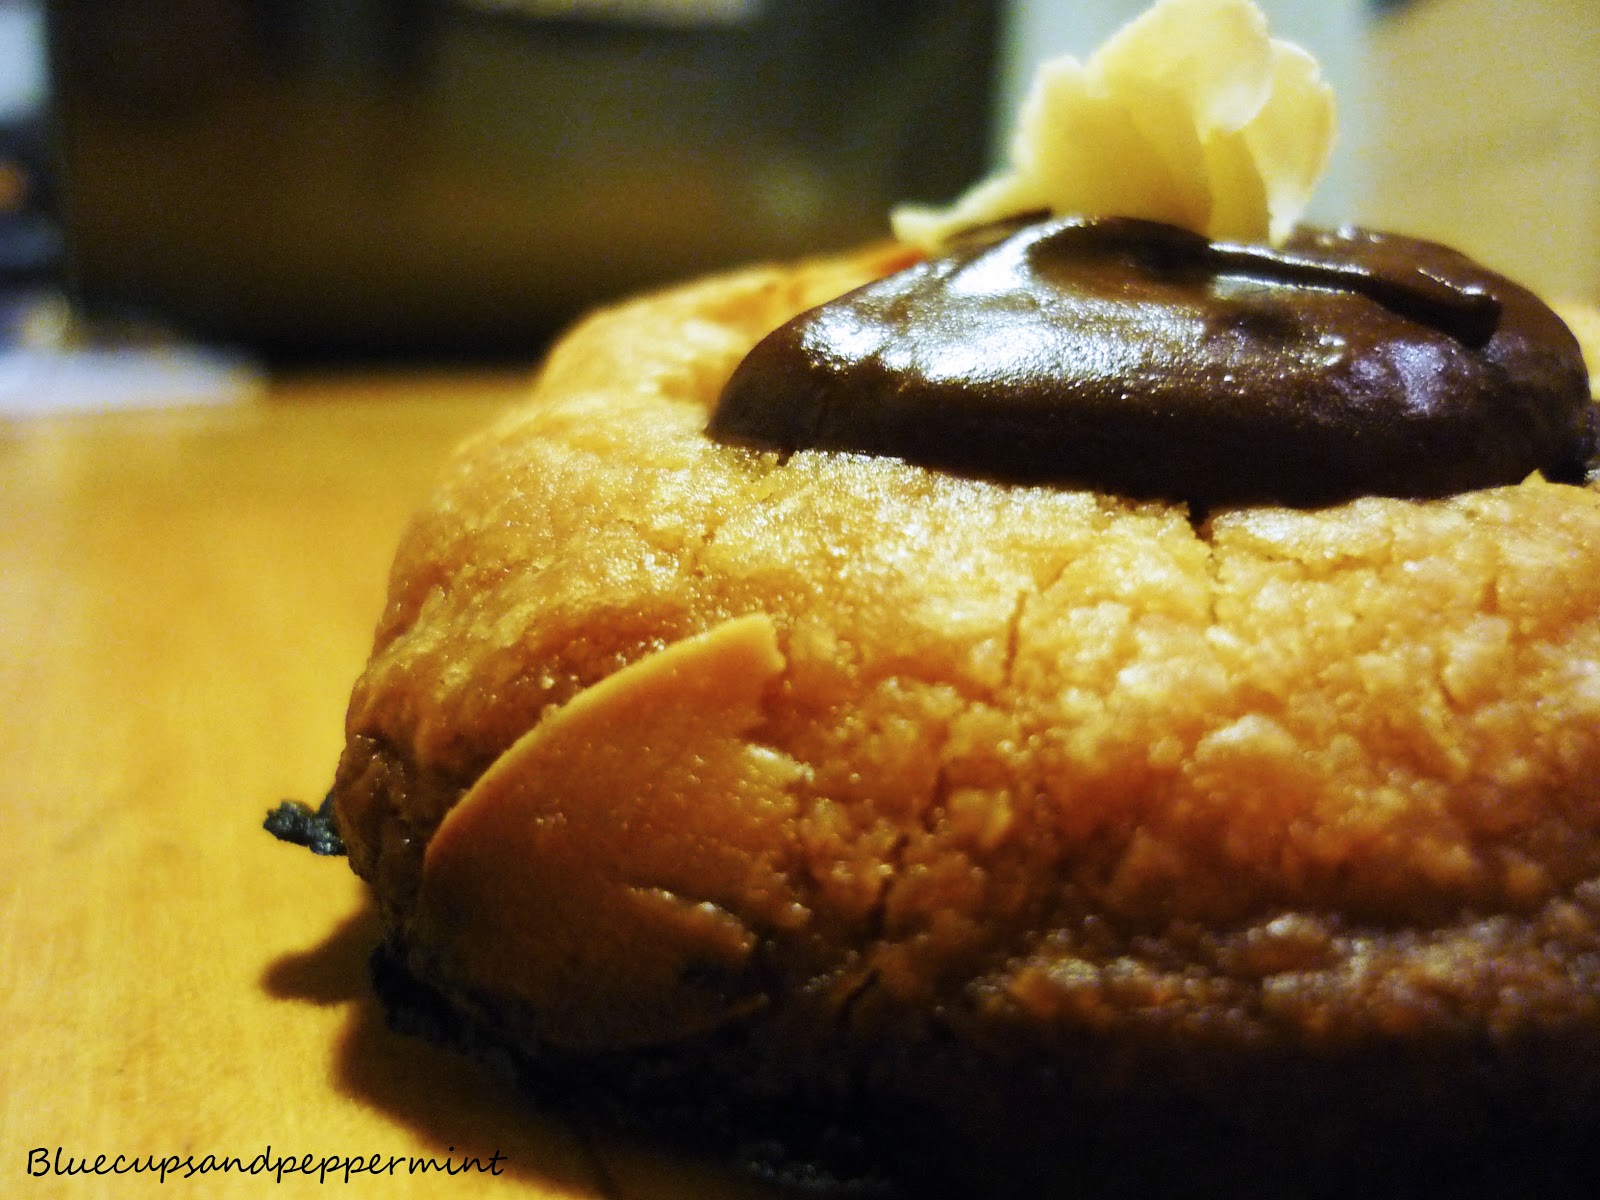
So, mine have no pecans, and no caramel. But they do have chocolate. And almonds. Oh-yes-they-do. And they taste awesome.

INGREDIENTS (makes 14 big cookies): 

150 gr unsalted butter
½ cup confectioners sugar
¼ teaspoon salt
1 ¼ (well, more or less. As we know) flour
1 cup sliced almonds
100 gr dark chocolate
50 additional gr butter (I misinterpreted the original recipe so, this massive amount of butter got even bigger. Sorry Martha. Well, not really.)

(By the way, this is really all you need. Once you’ll be having your cookie bite melting in your mouth, come back, re-think about how fast and easy was to make them. Now you can be even happier.)

DIRECTIONS:

In a bowl mix together butter, sugar and salt, and mix them with an electric mixer on medium speed for about 2 minutes. Well, in any case, until smooth.
Add the flour and beat again. Don’t worry if everything looks like a big bowl of crumbles. It’s fine.
Add also the almonds and knead everything with your hands. (Isn’t it just great to squeeze all that butter in your hands?)
2Now preheat oven at 350°F/180°C. In the meanwhile, form little balls with your crumble-dough and set them nicely onto the oven plate.
3-  When the oven will be perfectly warm, put your amazing-cookies-to-be in, and leave them for about 10 minutes. Then take them out and press your thumb on top of the cookies (no, use a spoon, or a cork, or whatever you want but, seriously, they’re gonna be hot. I know they’re called thumbprints. You’re safe, I’ll tell no one.) to create a nice and cozy hollow for your chocolate. Put back in the oven and leave them until they’ll be golden-brown on top, say… 7 more minutes? 8?
In the meanwhile, set two pots, one over the other, on the fire, filling the one under with water. Let’s say enough to reach the bottom of the one on top. In this one, mix together the chocolate and the 50 gr of butter, stirring from time time until you get a superinviting cream. Please don’t eat it. you will need it for the cookies.
When your cookies will be ready, take them off the oven, fill the hollows with chocolate, decorate the tops with some almonds and let cool down… and then eat loads!

(Don’t forget to finger-clean the chocolate pot.)


Wednesday 12 December 2012

OATMEAL, MARMALADE AND FRESH MINT


 Oh yes, you saw it right.
That's oatmeal. And you know why we’re gonna try a new version of oatmeal? Because… it’s almost Friday!!! That is my slow breakfast day, hence, oatmeal day!
Yes, I know it’s actually just Wednesday, but the hope for Fridays is one of the few things that keep me alive, so, let’s try not to be to strict about it.

So, oatmeal!

This version is as easy as the other one, but this time I gave it a fresh twist with some freshly picked mint.
So, basic steps for oatmeal:
1 glass oatmeal = 2 glasses water 

This is the golden proportion. And remember that one glass of oatmeal is enough for two people. 
Well, or for a really hungry one.
This time no sugar: the reddish thing on top of the oatmeal, the one looking like marmalade, it’s actually marmalade, which is already really sweet.
So we said, for a reeeeeally creamy oatmeal pour it into the water before it’s cooking, and leave it on the fire –stirring from time to time- until it has soaked it all. Otherwise, for a medium creamy oatmeal, wait for the water to be boiling and pour the oatmeal just then.
Then it’s all about splashing it in your favourite bowl, choosing your favourite marmalade (I went for a superclassic: strawberry) and mix them together. Don’t forget to add some fresh mint for the real wake-up taste.
Quick, easy and healthy. I couldn’t love it more. 

And now, if you will excuse me, i'll go dreaming of breakfasts.


Friday 30 November 2012

MONTHLY ROUND-UP


Ou la la! November is almost over.
So, since I don't want you to miss any of these yummy and supereasy recipes, I think it's time for... a monthly round-up!
Well, it might also be because the battery of my camera is dead and I can't find the recharger anymore. So I couldn't take pictures of things like a super soft Quatre-quarts cake, an amazing sole muniere with a dandelion and sweet corn salad (and fries. I know we should have not.), or some super tasty ricotta and honey muffins...
Well, as I was saying, time for a monthly round-up!

 It all started with the basics: muffins! (Yes, I think after all this time I've made up my mind: they're muffins.) These were banana and chocolate chips, a treat for a very special day (or a treat that can make any day special).
 Then we had a variation on lunch-at-work sandwiches with these sfot bagels


and the aubergine rolls I decided to have with them. Nice thing about bagels is that you can really eat them with anything: from marmalade to scrumbled eggs, from Nutella to aubergine rolls. Nice thing of these aubergine rolls, on the other hand, is that they are so good.

Oh, and also that you can eat them either warm or cold, and they're still so good.


Then There was a really happy and successful experiment with celery leaves: I stopped throwing them away and I started making awsome pesto instead.
 And then it was time for a dessert.
When you turn your heater up to pretend it's not autumn yet.
It's for those moments that this fresh dessert is really perfect. Muesli, yogurt and spiced-up pear marmalade.
Going super healthy and super easy (oh magical combination), we had this chickpeas, onion and mint salad, a chinese cabbage and olives salad and some smoked cheese  sandwiches.


Finally, it was indeed just something breakfastish missing. So, here we go with this autumnal take on oatmeal.


Did you try any of these?
If not, you should.
If yes, let me know!


Friday 23 November 2012

THE HEALTHY BREAKFAST FOR THE LAZY DAYS - OATMEAL AND CRUNCHY APPLE BITES

So I called it “the healthy breakfastfor the lazy days”, and that’s how it looks like.

It’s healthy, it’s yummy, and it’s slow.
It feels like a personal challenge to wake up every morning a minute later than the morning before, to see if even this time I can make it, to run there before the metro arrives, to feel the thrill..
Well, it’s not, there’s no thrill but the one I feel at 10 in the morning, break coming closer, when I realize that I will finally eat - because of course I didn’t have breakfast. Therefore when I left  there was no real rush to brush (fake, I constantly am in the urge to brush, but) since there was no food to brush away, which is the explanation of me going around with a toothbrush in my pocket at work.
All of this said, let’s go back to marrier thoughts: slow breakfasts.
There is one day per week in which I go to work in the afternoon, and in this magical day I get the crazy combination of sleeping more AND having breakfast. Heaven.
So, the only day in which I can have breakfast, I want a nice one.
OATMEAL AND CRUNCHY APPLE BITES
Ingredients:
There’s not much you need for this take on oatmeal and, considerning that these are among the most autumnal ingredients I can think of, you could have it even right now.
So, here we go – for two people:
-          Oatmeal – 1 glass
-          Water – 2 glasses
-          Apples – say 1 or 2
-          Sugar – 1 TBS
-          Cinnamon – a lot
Directions:
1-      Well, really important to remember is that, exactly like rice, oatmeal is going to soak all the water you give it, basically doubling in its amount. So, after figuring for how many people you’re going to prepare breakfast –or, after deciding how many times you want to have it- put the double amount of water in a pot and start cooking it. Now, if you want a really creamy oatmeal, you might put it right away with the water and leave it there until it soaks it all, taking care of stirring it from time to time. Otherwise, wait for the water to be cooking and pour the oatmeal in just then: you’ll get a creamy oatmeal, but that still maintains its basic structure.
2-      In any case, put a spoon of sugar in the water. Of course optional, but with slightly bitter apples I could use one.
3-      For the apples, same concept as for the oatmeal: if you want them really soft, put them in the pot together with the oatmeal while it’s cooking, if you want them crunchy, just add them when the oatmeal is ready. (I did half and a half. Yum.)
4-      If you like it, add a spoon of cinnamon (seriously, if you like apples of course you also like cinnamon) and eat it!
Wish you all a happy, slow breakfast.

FIOCCHI D’AVENA (ANCHE SE L’OATMEAL RIMANE L’OATMEAL) E PEZZETTI DI MELA CROCCANTI
Ingredienti:
non c’è molto di cui avete bisogno per questa versione di oatmeal e, considerato che questi sono fra gli ingredienti più autunnali che mi vengano in mente, volendo potreste anche prepararvelo adesso.
Quindi, per 2 persone(doveva essere solo per me ma ho sbagliato le dosi, quindi):
-          Fiocchi d’avena – 1 bicchiere
-          Acqua – 2 bicchieri
-          Mele – facciamo 1 o 2
-          Zucchero – un cucchiaio grande
-          Cannella: tanta
Procedimento:
1-      Innanzitutto è importante ricordare che, esattamente come il riso, i fiocchi d’avena assorbiranno tutta l’acqua che ci metterete, diventando praticamente il doppio (io per esempio ho un po’abbondato. Troppo, abbondato). Quindi dopo aver fatto mente locale sul numero di persone per cui dovete preparare la colazione – o dopo aver deciso quante colazioni volete fare voi medesimi in quella stessa mattina – mettete una quantità doppia di acqua in una pentola e fatela bollire. Dunque, se volete un oatmeal veramente  cremoso, potete metterlo direttamente in pentola con l’acqua e lasciarcelo fino a che non l’ha assorbita tutta. Altrimenti aspettate che l’acqua bolla, e aggiungete i fiocchi d’avena solo allora: in questo modo otterrete on oatmeal cremoso, ma in cui i fiocchi mantengono la loro consistenza.
2-      In ogni caso, aggiungete un cucchiaio di zucchero all’acqua. È chiaramente opzionale ma, con delle mele un po’acidule secondo me ci stava bene.
3-      Per le mele vale la stessa idea dei fiocchi d’avena: se le volete morbide morbide, mettetele in pentola insieme ai fiocchi d’avena e lasciateli cuocere insieme altrimenti, se le volete croccanti, aggiungetele alla fine quando l’oatmeal sarà pronto. (Io ho fatto metà e metà. Yum.)
4-      Se vi piace, aggiungete un cucchiaio di cannella (seriamente, se vi piacciono le mele ovvio che vi piace anche la cannella) e magiatelo!

Buona lenta colazione.


Tuesday 20 November 2012

CHICKPEAS, ONION AND MINT SALAD, CHINESE CABBAGE AND OLIVES –YES, IT’S ANOTHER SALAD, WE JUST CAN’T GET ENOUGH- AND SMOKED CHEESE SANDWICH.


To the discovery of the mysterious ingredient!
Days of anxious wait have preceded the arrival of our “panier bio” of the week. We got all excited reading about this chinese cabbage no one had ever heard about before and we started to make all kind of conjectures about it: would it be still green? Still crunchy? Still stinky when you boil it?
And then day came. It arrived. In all its funniness. Yes, because this is what it looks like.

Isn’t it adorable? Honestly, I have no idea why it’s called chinese, but I would have found lots of other more appropriate names for it: gnome cabbage. Or unicorn cabbage. Or raindrop cabbage. Just to mention a few.
So, many, more, approriate name.  more in line with it’s funniness.
Whatever, it’s still really funny.
And stimulating, I would add.
INGREDIENTS:
Ø  Salad 1: chickpeas, onion and mint salad
-          Chickpeas
-          Onion
-          Mint
-          Olive oil
-          Salt
(Please do not underestimate the importance of this ingredients list: to forget to add salt would be a catastrophy).

Ø  Salad 2: chinese cabbage and olives salad
-          Chinese cabbage
-          Olives
-          Olive oil
-          Salt
(Same as before PLUS, I’m also giving you a priceless tip, in case the exoticness of the chinese cababge was about to discourage you from trying this super nice salad: it can be replaced with savoy cabbage, that tastes exactly the same. –Though, wothout being as funny, I have to say).

Ø  Smoked cheese sandwich
-          Smoked cheese
-          Bread
-          Salt and pepper

Without indulging on directions (I trust you), I think it’s just important to remind that, if you’re using dried chickpeas, you should remember to leave them in a bowl full of water for 24 hours and boil them for half an hour before eating them.
I also recognize, though, that if you are in a dried-beans-excitement as I am, you already know this while, if you’re not sharing this whole excitement, you might not be that concerned, since the only thing you have to do with canned beans is to open the can.
Well, ok, I thin that's all.

INGREDIENTI:
Ø  Insalata 1: Insalata di ceci, cipolla e menta
-          Ceci
-          Cipolla
-          Menta
-          Olio d’oliva
-          Sale
(Vi prego di non sottovalutare l’importanza di questa lista degli ingredienti: dimenticare di aggiungere il sale sarebbe una catastrofe).

Ø  Insalata 2: Insalata di cavolo cinese e olive
-          Cavolo cinese
-          Olive
-          Olio d’oliva
-          Sale
(Vedi sopra. INOLTRE, vi do anche un impagabile consiglio, nel caso l’esoticità del cavolo cinese fosse sul punto di scoraggiarvi dal provare questa buonissima insalata: può essere sostituito con la verza, che ha esattamente lo stesso sapore. – Nonostante non sia altrettanto buffa, mi sento di aggiungere).

Ø  Toast con formaggio affumicato
-          Formaggio affumicato
-          Pane
-          Sale e pepe
Senza soffermarci sui preparativi (mi fido di voi), credo sia importante ricordare che, usando I ceci secchi, dovete ricordarvi di lasciarli in una ciotola piena d’acqua per 24 ore, e di bollirli per mezz’ora prima di mangiarli.
Certo è che se anche voi, come me, siete in questa “fase di esaltazione da legumi secchi”, questo lo sapete già e, se invece non doveste sentire tutta questa euforia, potrebbe non interessarvi più di tanto, considerato che l’unica cosa da fare prima di mangiare legumi in scatola è aprire la scatola.
Bè, ok, credo che sia tutto.

Sunday 18 November 2012

CUPS OF YOGURT AND… SOME KIND OF FRUIT


If you are a yogurt freak, or a summery-desserts freak, or a yogurt-summery-desserts freak and you were already starting to despair in front of the relentless advance of winter, 
here i come to rescue you.
All you need is a kind of a heavy dinner –calzoni, for example- that you might want to eat right next to the oven –because, as the host, you’ll have to constantly check the baking process- oven, I was saying, set to 220C°/428F° (more or less, but still). 
Just a few things and the trick is done: the only thing you would want to eat right after will be a refreshing yogurt dessert.
Good thing about this dessert is that, if you take care to heat yourself up in advance, you can have this dessert at any time of the year: the original recipe was in fact featuring forest fruits that, in a belgian november, are a kind of difficult to be found. But you can just give it a little twist and use any fruit that comes to your mind.
Now, let’s go and be creative.


CUPS OF YOGURT AND… SOME KIND OF FRUIT

Ingredients:
-          50 ml water (when you don’t have a graduated glass, beer glasses are coming really helpful)
-          2 ts cornstarch
-          250 gr fruit
-          20 gr sugar
-          450 gr natural yogurt
-          1 TBS honey
-          muesli

    Directions:
1-      Start cooking –on a low fire- the fruits (to be really creative, you could also mix more that one kind. I was just really autumny, got pears) of your choice in a pot with the water and the sugar. Leave it for let’s say 5 minutes or, in any case, until when the fruit will start melting to a marmalade-like consistency.
2-      Melt two tea-spoons of cornstarch into a bit of water, and pour it into your fruit marmalade, leaving on the fire for a few more minutes. Then, pour it into 4 glasses and put them in the fridge for about 20 minutes.
3-      In the meanwhile, add a spoon of liquid honey to your natural yogurt and stir until they’re perfectly mixed (well, or even not. Just do it the way you like it).
4-      Take the glasses out of the fridge and add the yogurt. Then, add the last layer covering everything with muesli (I chose the one with pieces of chocolate in it.)
5-      Put them back in the fridge until serving!

       COPPETTE DI YOGURT E… FRUTTA, UN FRUTTO QUALSIASI
        Ingredienti:
-          50 ml acqua (quando non si ha un bicchiere graduato, quelli di birra si rivelano particolarmente utili)
-          2 cucchiaini amido di mais
-          250 gr frutta
-          20 gr zucchero
-          450 gr yogurt al naturale
-          1 cucchiaio di miele
-          muesli

Procedimento:

1-      versate in un pentolino l’acqua e lo zucchero e cuocetevi, a fuoco basso, la frutta (per essere veramente creativi potreste anche mischiare più di un tipo di frutta. Io mi sentivo molto autunnale ed ho optato per le pere). Lasciate cuocere per circa 5 minuti, o fino a quando la frutta non comincerà a sciogliersi e ad avere la consistenza di una marmellata.
2-      Sciogliete due cucchiaini di amido di mais in un po’d’acqua e versatela nella vostra “marmellata”, lasciando il tutto sul fuoco ancora per qualche minuto. Dopodichè, versate il tutto in 4 bicchieri e metteteli in frigo per circa 20 minuti.
3-      Nel frattempo, aggiungete allo yogurt un cicchiaio di miele e mescolate fino a che non saranno ben amalgamati (o anche no. insomma, come preferite).
4-      Prendete I bicchieri dal frigo e aggiungete lo yogurt, quindi aggiungete anche l’ultimo strato coprendo tutto di muesli (io ci ho messo quello con I pezzetti di cioccolata).
5-      Rimettete I bicchieri in frigo e lasciateceli fino al momento di servire!


Thursday 8 November 2012

AUBERGINE ROLLS

Bagels are a nice alternative to bread when you have to eat out of the house but, indeed, they’re not much of a lunch themselves. Nice thing is that they’re not really salty, and not sweet either.
Lame, you might say.
Wrong, I might answer.
This just means that you can eat them with basically anything you fancy at the moment. So, what I had with them this time was a salty, healthy, tasty –ok, now I’m gonna stop- finger food.
Aubergine lovers, this is for you.

AUBERGINE ROLLS
Ingredients:
-          Aubegines (How many? Well, it depends on how hungry you are.)
-          Fresh herb cheese
-          Herbs (I had rosmary and sage)

Directions:
1-      Slice the aubergines along their lengh. The slices should be thin enough to roll them easily afterwards. Pay attention at not slicing them too thin, though: otherwise they might tear apart while spreading the cheese.
2-      Lay them down into a colander and overspread them with coarse salt. That’s a very important step  that you should never forget: this way they will drain all their bitter jiuce off, so that they can taste just like aubergine. Leave them drain for about an hour.
3-      After that, whash them to eliminate the salt in excess and dry them with a clean dish cloth.
4-      Grill them in a pan with no oil nor butter until they get golden brown and soft to a fork.
5-      Let them cool, then spred the herb cheese on.
6-      Chop your herbs and sprinkle them over the cheese layer, and roll the aubergine.
7-      Ready!
INVOLTINI DI MELANZANE

Ingredienti:
-          Melanzane (Quante? Bè, dipende da quanta fa me avete.)
-          Formaggio fresco alle erbe
-          Erbe aromatiche (Io ho usato rosmarino e salvia)
Preparazione:
1-      Tagliate le melanzane a fette lungo la lunghezza. Ecco. Tagliate delle fette abbastanza sottili perchè si possa poi arrotolarle. Fate attenzione, però, a non farle troppo sottili perchè potrebbero lacerarsi quando andrete a spalmare il formaggio.
2-      Adagiatele in uno scolapasta e cospargete ogni strato di sale grosso. Questa è una fase importante che non dovreste mai dimenticare: il sale le drenerà di tutto il loro liquido amarognolo, di modo che sappiano solo di melanzana. Lasciatele drenare per circa un’ora.
3-      Fato ciò, lavatele per eliminare il sale in eccesso ed asciugatele con un canovaccio.
4-      Grigliatele in una padella antiaderente senza olio nè burro fino a che non saranno dorate e si potranno forare facilmente con una forchetta.
5-      Lasciatele raffreddare e spalmatele tutte con il vostro formaggio alle erbe.
6-      Sminuzzate le erbe aromatiche e cospargetevi lo strato di formaggio fresco, quindi arrotolatele.
7-      Pronte!
Related Posts Plugin for WordPress, Blogger...