Showing posts with label Desserts. Show all posts

Monday, 1 September 2014

ENCOUNTERS

Get ready to meet your new best friend.

Today at work a miracle has happened.
I was having a crazy sugar crave. Well, maybe when you're on the border of having a panik attak it's more of a need, but still. Important thing is that I was desperate, begging only for some sugar while drawning in a sea of invoices and boring office stuff.
 And then, the miracle.
A random, desperate day, just turned into the day in which my lovely boss brings cookies.

-Just to be clear and avoid silly misunderstandings about me getting less bitter: it's no dream office. The one with scandinavian design forniture, where  flowers don't die, people are happy and your boss brings cookies... No.
Apparently no one was ever concerned with design, or windows for that matter, my plant died in one day straight and people smile only if someone has made a joke about sex.

I work in a nightmare office and my boss has brought cookies. Period.

So, back to the point, these cookies where these cookies, and they will be your new best friend.
And they will because:
they're loaded with sugar and coconut, PLUS, you need only 3 ingredients to make them PLUS they're ready in maximum top 30 minutes. -And, if 20 of those 30 minutes (negotiable) are baking time, that's to me sounds like a very good deal.-

So, for two greedy people you'll need:

  • - 3 egg whites
  • -110g (half a glass) sugar
  • - 125gr dry grated coconut

  1. divide the the yolk from the egg white (you might use the yolks the morning after to make, e.g., french toasts for breakfast).
  2. put your egg whites on a very low fire, add all the sugar and stir until all the sugar has melted. Be very careful not to cook the egg white.
  3. once the sugar has melted, start adding the coconut, constantly mixing. (As for anything, you have measures but, just keep on adding until the consistency feels right: firm but not too hard.)
  4. with the help of a spoon form little balls with your coconut dought, and bake them until golden at 180°. (Estimated baking time: 15 mins).


Well, also real friends are cool.
So they say.


Thursday, 19 December 2013

CLOSED FOR MOVING. BIG RE-OPENINGS AND FAIRY TALES.

And, yes, we are still living a sort of camping experience, getting our clothes out of boxes in the cellar and finding the baking paper in the toilette but, finally, we moved!
It all sounds like a Disney story, a good mix of magic and drama and, in our case, I would say a mix between Cinderella and SnowWhite.


So, once upon a time, there were two girls forced to endlessly clean a house (that would be us), with an evil stepmother calling every half hour to yell that they had to do it better and faster (and that would be the landlady) and, yes, we even had our own midnight magic.
Although in our case, sadly enough, there were no gigantic pumpkins in the living room, just our cat that, at midnight o'clock, gracefully peed right in the middle of our parquet.
Yes, the last evening was quite a nightmare.


And even though now we've moved to the land of Far Far Away, the evil witch is still part of our story, holding our deposit hostage since a month. So,we just baked our poisonous apple into some delicious, end of the season's apple muffins.

So, that's basically the very same recipe I used for the apple cake you've never seen. Of course with halved measure, just because this time I didn't need 45 muffins but, well, you see.
Anyway, what happened is that this time I forgot to marinate the apples in lemon juice and cinnamon.


So, pity for the lemon, but I really needed the cinnamon: so what I did was mixing some cinnamon and some sugar, and topping the muffins before baking them.
So, pros: when baked the muffins had this crunchy, sugary, cinnamony top that was just so nice.
Cons: I think the topping kinda prevented them from rising as puffy as they could have been.
Still, I would say: success.

For directions, it's seriously the very same as for this cake, but with half the ingredients. I really just wanted to publish the pics.


Friday, 25 October 2013

Apple cake, or WHY WE LOVE AUTUMN

Well well.
To keep the pace with all the people that were singing the praises of autumn long ago, when it actually arrived, I also had my 
"welcome, autumn!" 
post.
I had all these pictures of beautiful berries on the weirdest tries and in the weirdest colours taken at the weirdest times of the day. A really nice project, I have to say.
And then the disgrace happened: our camera vanished. I really prefer to believe in magic, even though obscure magic, and believe it disappeared in a glittering cloud rather then to think that someone actually stole it (which, for the boring and sad non-believers, given the circumstances, seems to be the most probable option.)
Well, that's why in this post there are no pictures. Good thing is that you don't really need to see an apple cake to imagine how fragrant and inviting it might be.

So, before starting I have to tell you a little something 'cause, if normally I'm not really precise with measures, well, this time it went even further. Apparently something went wrong during the measuring process -although I feel like saying that wrong is not at all the right word. I mean, if you planned to bake one delicious apple cake, and at the end you find yourself with a lot more, something went definitely magic, not wrong.- So, as I was saying, something went magical and, what was supposed to be one normal-size cake turned out being: 
one normal side cake,
 three mini-size-cakes, 
one overflowing muffin.
So, I suggest you carefully follow the instructions only if you're planning to eat a lot, of apple cake.
By the way, to compensate the lack of pictures, I tried to make this post visually appealing anyway. I hope you appreciate the effort. 
I could also do colours but, honestly, that really felt too much.


Here is, just in case you're not funny and you didn't like my polifontic previous version, an easier-to-read one.


Well well.
To keep the pace with all the people that were singing the praises of autumn long ago, when it actually arrived, I also had my

"welcome, autumn!"

post.

I had all these pictures of beautiful berries on the weirdest tries and in the weirdest colours taken at the weirdest times of the day. A really nice project, I have to say.

And then the disgrace happened: our camera vanished. I really prefer to believe in magic, even though obscure magic, and believe it disappeared in a glittering cloud rather then to think that someone actually stole it (which, for the boring and sad non-believers, given the circumstances, seems to be the most probable option.)

Well, that's why in this post there are no pictures. Good thing is that you don't really need to see an apple cake to imagine how fragrant and inviting it might be.

So, before starting I have to tell you a little something 'cause, if normally I'm not really precise with measures, well, this time it went even further. Apparently something went wrong during the measuring process -although I feel like saying that wrong is not at all the right word. I mean, if you planned to bake one delicious apple cake, and at the end you find yourself with a lot more, something went definitely magic, not wrong.- So, as I was saying, something went magical and, what was supposed to be one normal-size cake turned out being:

one normal side cake,
three mini-size-cakes,
one overflowing muffin.

So, I suggest you carefully follow the instructions only if you're planning to eat a lot, of apple cake.

1 + 2/3 cups flour
4 apples
1 + 1/2  cups sugar
3 eggs
75gr butter
1 glass of milk
1 + 1/2 tsp baking soda
1 lemon

1- Peel and slice the apples, then let them marinate in the juice of one lemon and a couple TBS sugar

2- In the meanwhile, beat the yolks with the sugar. In a separate bowl, beat the whites until stiff.

3- Add to the yolks-and-sugar-batter: the sifted flour, baking soda, the butter that you had previously taken out from the fridge (and that you have also reduced in small pieces) and the milk. Mix everything well and, at least, add also the yolks, paying attention in stirring them gently and from down upwards.

4- Fold in also the apples, but keep aside enough to cover the top of the cake.

5- Pour the batter in a greased an sugared form, then get creative and decorate it with the apples you kept aside.

6- Bake for some 40 minutes at 180°F

NOTE: If you make drawings with your apples, check your cake properly before taking it out from the oven: being covered might make baking times a bit longer. If you don't feel creative and you were not in the mood to draw, leave it anyway in the oven for 40 minutes. If you think the top is getting brown a little too fast, cover it with some aluminium.

Wednesday, 19 December 2012

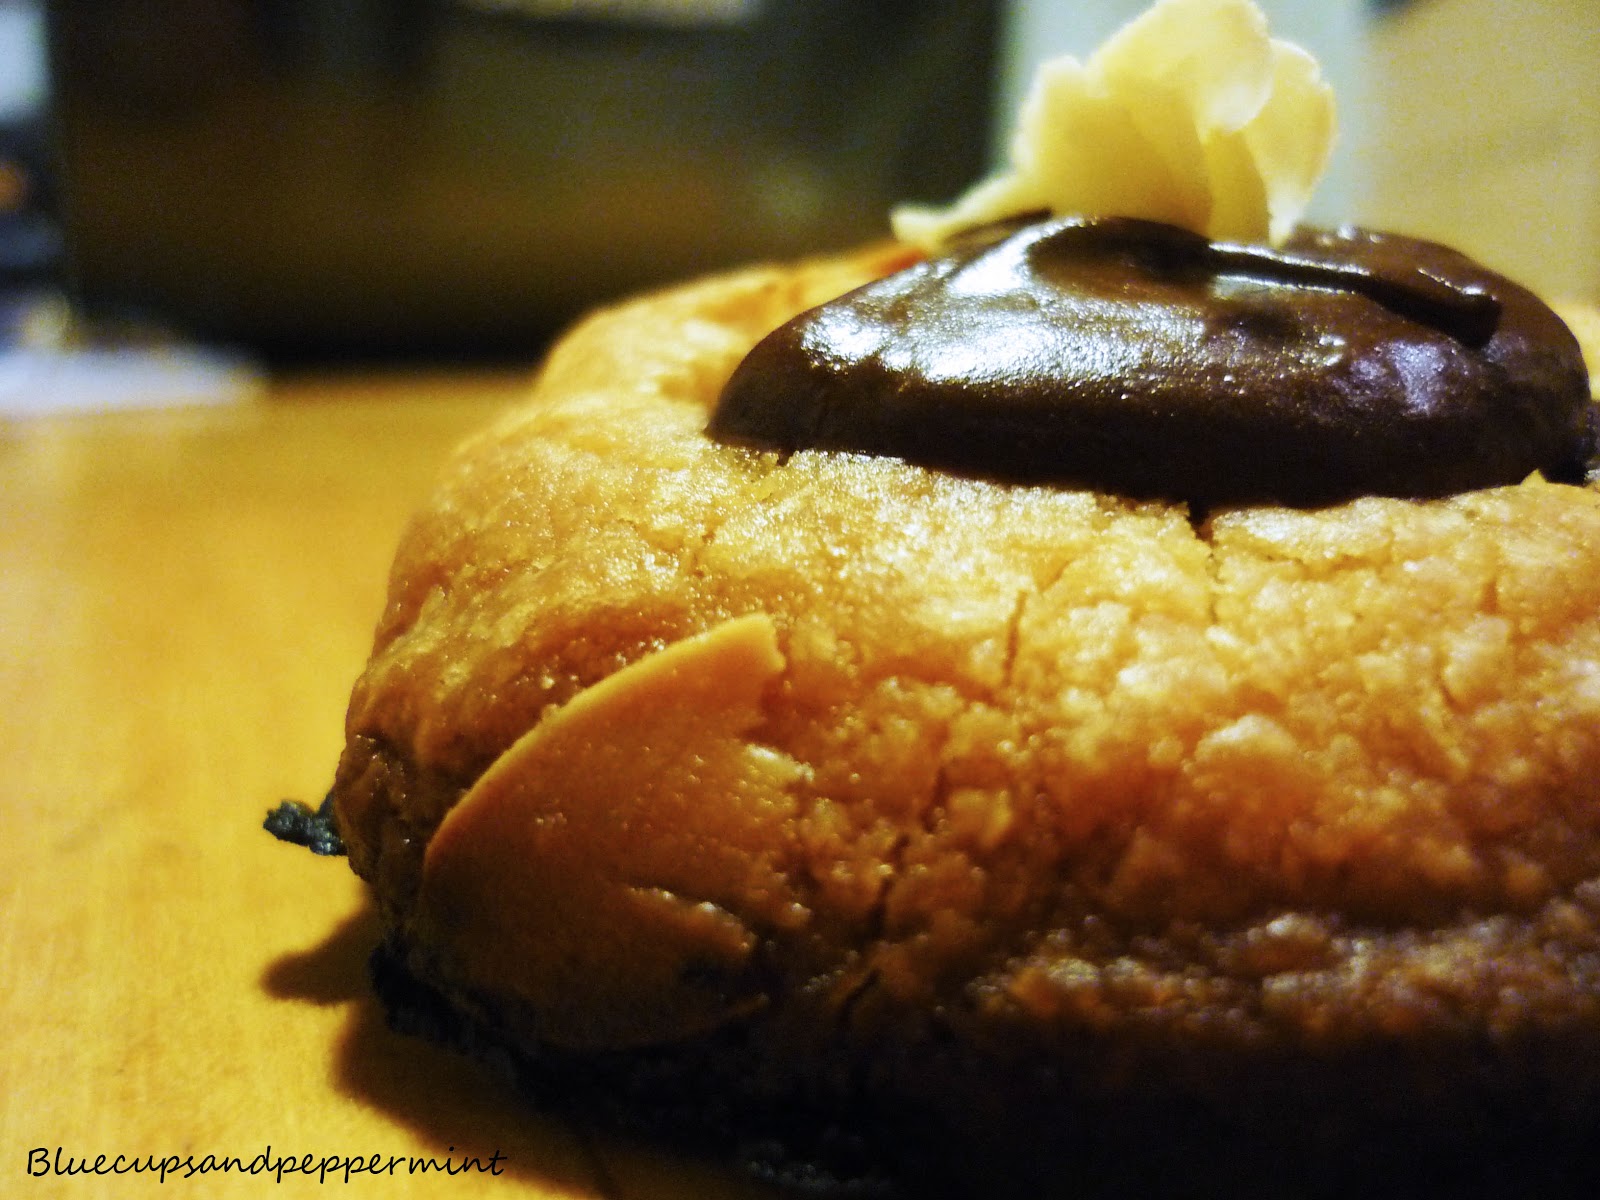
CHOCOLATE THUMBPRINT COOKIES


Maybe it’s Christmas getting closer, or maybe it’s just  the explosion of cookies pictures I see everyday on beautiful blogs, or maybe it’s just that we’re all addicted at a certain extent to butter and chocolate. Especially when they show up together. Ok, me, I am addicted to it.
In any case, you can deny it, but I know I’m not alone.
Anyway, whatever the reason, I’ve been in a thumbprint mood for days. I’ve seen pictures of these decadent cookies in perfectly circular shapes, decorated with pecans and overflowing with chocolate and caramel, looking so wow that my mouth gets watery just at the thought of them.
So of course I couldn’t try those as a first attempt at thumbprint cookies.
So, mine have no pecans, and no caramel. But they do have chocolate. And almonds. Oh-yes-they-do. And they taste awesome.

INGREDIENTS (makes 14 big cookies): 

150 gr unsalted butter
½ cup confectioners sugar
¼ teaspoon salt
1 ¼ (well, more or less. As we know) flour
1 cup sliced almonds
100 gr dark chocolate
50 additional gr butter (I misinterpreted the original recipe so, this massive amount of butter got even bigger. Sorry Martha. Well, not really.)

(By the way, this is really all you need. Once you’ll be having your cookie bite melting in your mouth, come back, re-think about how fast and easy was to make them. Now you can be even happier.)

DIRECTIONS:

In a bowl mix together butter, sugar and salt, and mix them with an electric mixer on medium speed for about 2 minutes. Well, in any case, until smooth.
Add the flour and beat again. Don’t worry if everything looks like a big bowl of crumbles. It’s fine.
Add also the almonds and knead everything with your hands. (Isn’t it just great to squeeze all that butter in your hands?)
2Now preheat oven at 350°F/180°C. In the meanwhile, form little balls with your crumble-dough and set them nicely onto the oven plate.
3-  When the oven will be perfectly warm, put your amazing-cookies-to-be in, and leave them for about 10 minutes. Then take them out and press your thumb on top of the cookies (no, use a spoon, or a cork, or whatever you want but, seriously, they’re gonna be hot. I know they’re called thumbprints. You’re safe, I’ll tell no one.) to create a nice and cozy hollow for your chocolate. Put back in the oven and leave them until they’ll be golden-brown on top, say… 7 more minutes? 8?
In the meanwhile, set two pots, one over the other, on the fire, filling the one under with water. Let’s say enough to reach the bottom of the one on top. In this one, mix together the chocolate and the 50 gr of butter, stirring from time time until you get a superinviting cream. Please don’t eat it. you will need it for the cookies.
When your cookies will be ready, take them off the oven, fill the hollows with chocolate, decorate the tops with some almonds and let cool down… and then eat loads!

(Don’t forget to finger-clean the chocolate pot.)


Sunday, 18 November 2012

CUPS OF YOGURT AND… SOME KIND OF FRUIT


If you are a yogurt freak, or a summery-desserts freak, or a yogurt-summery-desserts freak and you were already starting to despair in front of the relentless advance of winter, 
here i come to rescue you.
All you need is a kind of a heavy dinner –calzoni, for example- that you might want to eat right next to the oven –because, as the host, you’ll have to constantly check the baking process- oven, I was saying, set to 220C°/428F° (more or less, but still). 
Just a few things and the trick is done: the only thing you would want to eat right after will be a refreshing yogurt dessert.
Good thing about this dessert is that, if you take care to heat yourself up in advance, you can have this dessert at any time of the year: the original recipe was in fact featuring forest fruits that, in a belgian november, are a kind of difficult to be found. But you can just give it a little twist and use any fruit that comes to your mind.
Now, let’s go and be creative.


CUPS OF YOGURT AND… SOME KIND OF FRUIT

Ingredients:
-          50 ml water (when you don’t have a graduated glass, beer glasses are coming really helpful)
-          2 ts cornstarch
-          250 gr fruit
-          20 gr sugar
-          450 gr natural yogurt
-          1 TBS honey
-          muesli

    Directions:
1-      Start cooking –on a low fire- the fruits (to be really creative, you could also mix more that one kind. I was just really autumny, got pears) of your choice in a pot with the water and the sugar. Leave it for let’s say 5 minutes or, in any case, until when the fruit will start melting to a marmalade-like consistency.
2-      Melt two tea-spoons of cornstarch into a bit of water, and pour it into your fruit marmalade, leaving on the fire for a few more minutes. Then, pour it into 4 glasses and put them in the fridge for about 20 minutes.
3-      In the meanwhile, add a spoon of liquid honey to your natural yogurt and stir until they’re perfectly mixed (well, or even not. Just do it the way you like it).
4-      Take the glasses out of the fridge and add the yogurt. Then, add the last layer covering everything with muesli (I chose the one with pieces of chocolate in it.)
5-      Put them back in the fridge until serving!

       COPPETTE DI YOGURT E… FRUTTA, UN FRUTTO QUALSIASI
        Ingredienti:
-          50 ml acqua (quando non si ha un bicchiere graduato, quelli di birra si rivelano particolarmente utili)
-          2 cucchiaini amido di mais
-          250 gr frutta
-          20 gr zucchero
-          450 gr yogurt al naturale
-          1 cucchiaio di miele
-          muesli

Procedimento:

1-      versate in un pentolino l’acqua e lo zucchero e cuocetevi, a fuoco basso, la frutta (per essere veramente creativi potreste anche mischiare più di un tipo di frutta. Io mi sentivo molto autunnale ed ho optato per le pere). Lasciate cuocere per circa 5 minuti, o fino a quando la frutta non comincerà a sciogliersi e ad avere la consistenza di una marmellata.
2-      Sciogliete due cucchiaini di amido di mais in un po’d’acqua e versatela nella vostra “marmellata”, lasciando il tutto sul fuoco ancora per qualche minuto. Dopodichè, versate il tutto in 4 bicchieri e metteteli in frigo per circa 20 minuti.
3-      Nel frattempo, aggiungete allo yogurt un cicchiaio di miele e mescolate fino a che non saranno ben amalgamati (o anche no. insomma, come preferite).
4-      Prendete I bicchieri dal frigo e aggiungete lo yogurt, quindi aggiungete anche l’ultimo strato coprendo tutto di muesli (io ci ho messo quello con I pezzetti di cioccolata).
5-      Rimettete I bicchieri in frigo e lasciateceli fino al momento di servire!


Monday, 22 October 2012

CHOCOLATE CHIPS AND BANANA CUPCAKES

Here I had quite a problem.
Not about making the dough, not about baking it, for sure not about eating it. The real problem was actually to call it. Arrived at the crucial moment, I didn’t really know if what I had just baked was a bunch of cupcakes, or muffins. Well, at the end of the day –one might say- you ate them all and they were crazy good, so.
But it becomes a problem when you have to title a recipe. Eh.
So I gathered some information and I found out there are three ways to distinguish a muffin from a cupcake:
-          Muffins are usually eaten for breakfast, therefore they’re bigger then cupcakes, that are normally eaten in the afternoon, say tea-time. –Mine were the size of muffin, but got eaten at cupcakes time. Uhm-
-          Cupcakes, besides being smaller, are usually frosted, while muffins are not, and the’re likely to contain pieces of fruit. – Ok, it seems mine are muffins then. My bad to eat them at the wrong hour-
-          It is also said, though, that muffins are usually prepared using oil, while cupcakes are made with butter. –Oh, so mine seem to finally be cupcakes. As much as they are muffins, at least-
Well, I can’t really tell what I baked.
What I can tell you, though, is that it was really good.


CHOCOLATE CHIPS AND BANANA CUPCAKES


Makes about 12 cupcakes
INGREDIENTS:
-          2 cups all-purpose flour
-          1 cup white granular sugar
-          1cup brown sugar
-          1 tea-spoon baking powder
-          ½ tea-spoon salt
-          1 cup (2 sticks) butter
-          4 eggs
-          1 cup milk
-          1 banana
-          Dark chocolate
DIRECTIONS:
1-      Preheat oven to 325 degrees.
2-      In a large bowl mix together flour, sugar, baking powder, salt and butter. Hand mix until everything’s combined.
3-      In a second bowl, whisk together eggs and milk.
4-      Start adding wet ingredients to dry ones, beating until ingredients are incorporated.
5-      Chop the banana and the dark chocolate, and add to the batter.
6-      Divide batter evenly, filling the cupcake forms about 2/3.
7-      Bake for about 15 – 20 minutes: you’ll know they’re ready when a knife inserted in the center comes out clean.
8-      Once baked, transfer to a wire rack to cool completely.
9-      Enjoy!

MUFFIN ALLA BANANA CON GOCCE DI CIOCCOLATO
Dosi per circa 12 muffins
INGREDIENTI:
-          2 tazze di farina
-          1 tazza di zucchero granulare bianco
-          1 tazza di zucchero di canna
-          1 cucchiaino di lievito in polvere
-          ½ cucchiaino di sale
-          200 gr di burro
-          4 uova
-          1 tazza di latte
-          1 banana
-          Cioccolato fondente per dolci

PREPARAZIONE:
1-      Preriscaldare il forno a 180°.

2-      In una ciotola abbastanza larga, mattete la farina, lo zucchero, il lievito, il sale e il burro. Mescolate con le mani fino a che il burro avrà creato un impasto. Non preoccupatevi, non importa che sia omogeneo.
3-      In una seconda ciotola, sbattete insieme il latte e le uova.
4-      Iniziate a versare la parte liquida nella ciotola degli ingredienti asciutti, mescolando fino a che tutti gli ingredienti non saranno ben amalgamati.
5-      Tagliate la banana e il cioccolato a pezzetti, dopodichè aggiungeteli all’impasto.
6-      Dividete l’impasto ottenuto in parti uguali riempiendo gli stampi dei vostri muffin fino a circa 2/3.
7-       Infornate e lasciate cuocere per circa 15 – 20 minuti. Saprete che sono pronti quando un coltello infilato al centro ne uscirà pulito.
8-      Una volta cotti, lasciateli raffreddare sopra ad una griglia.
9-      Godeteveli!

Related Posts Plugin for WordPress, Blogger...